Making Easter Ornaments With Scrap Paper
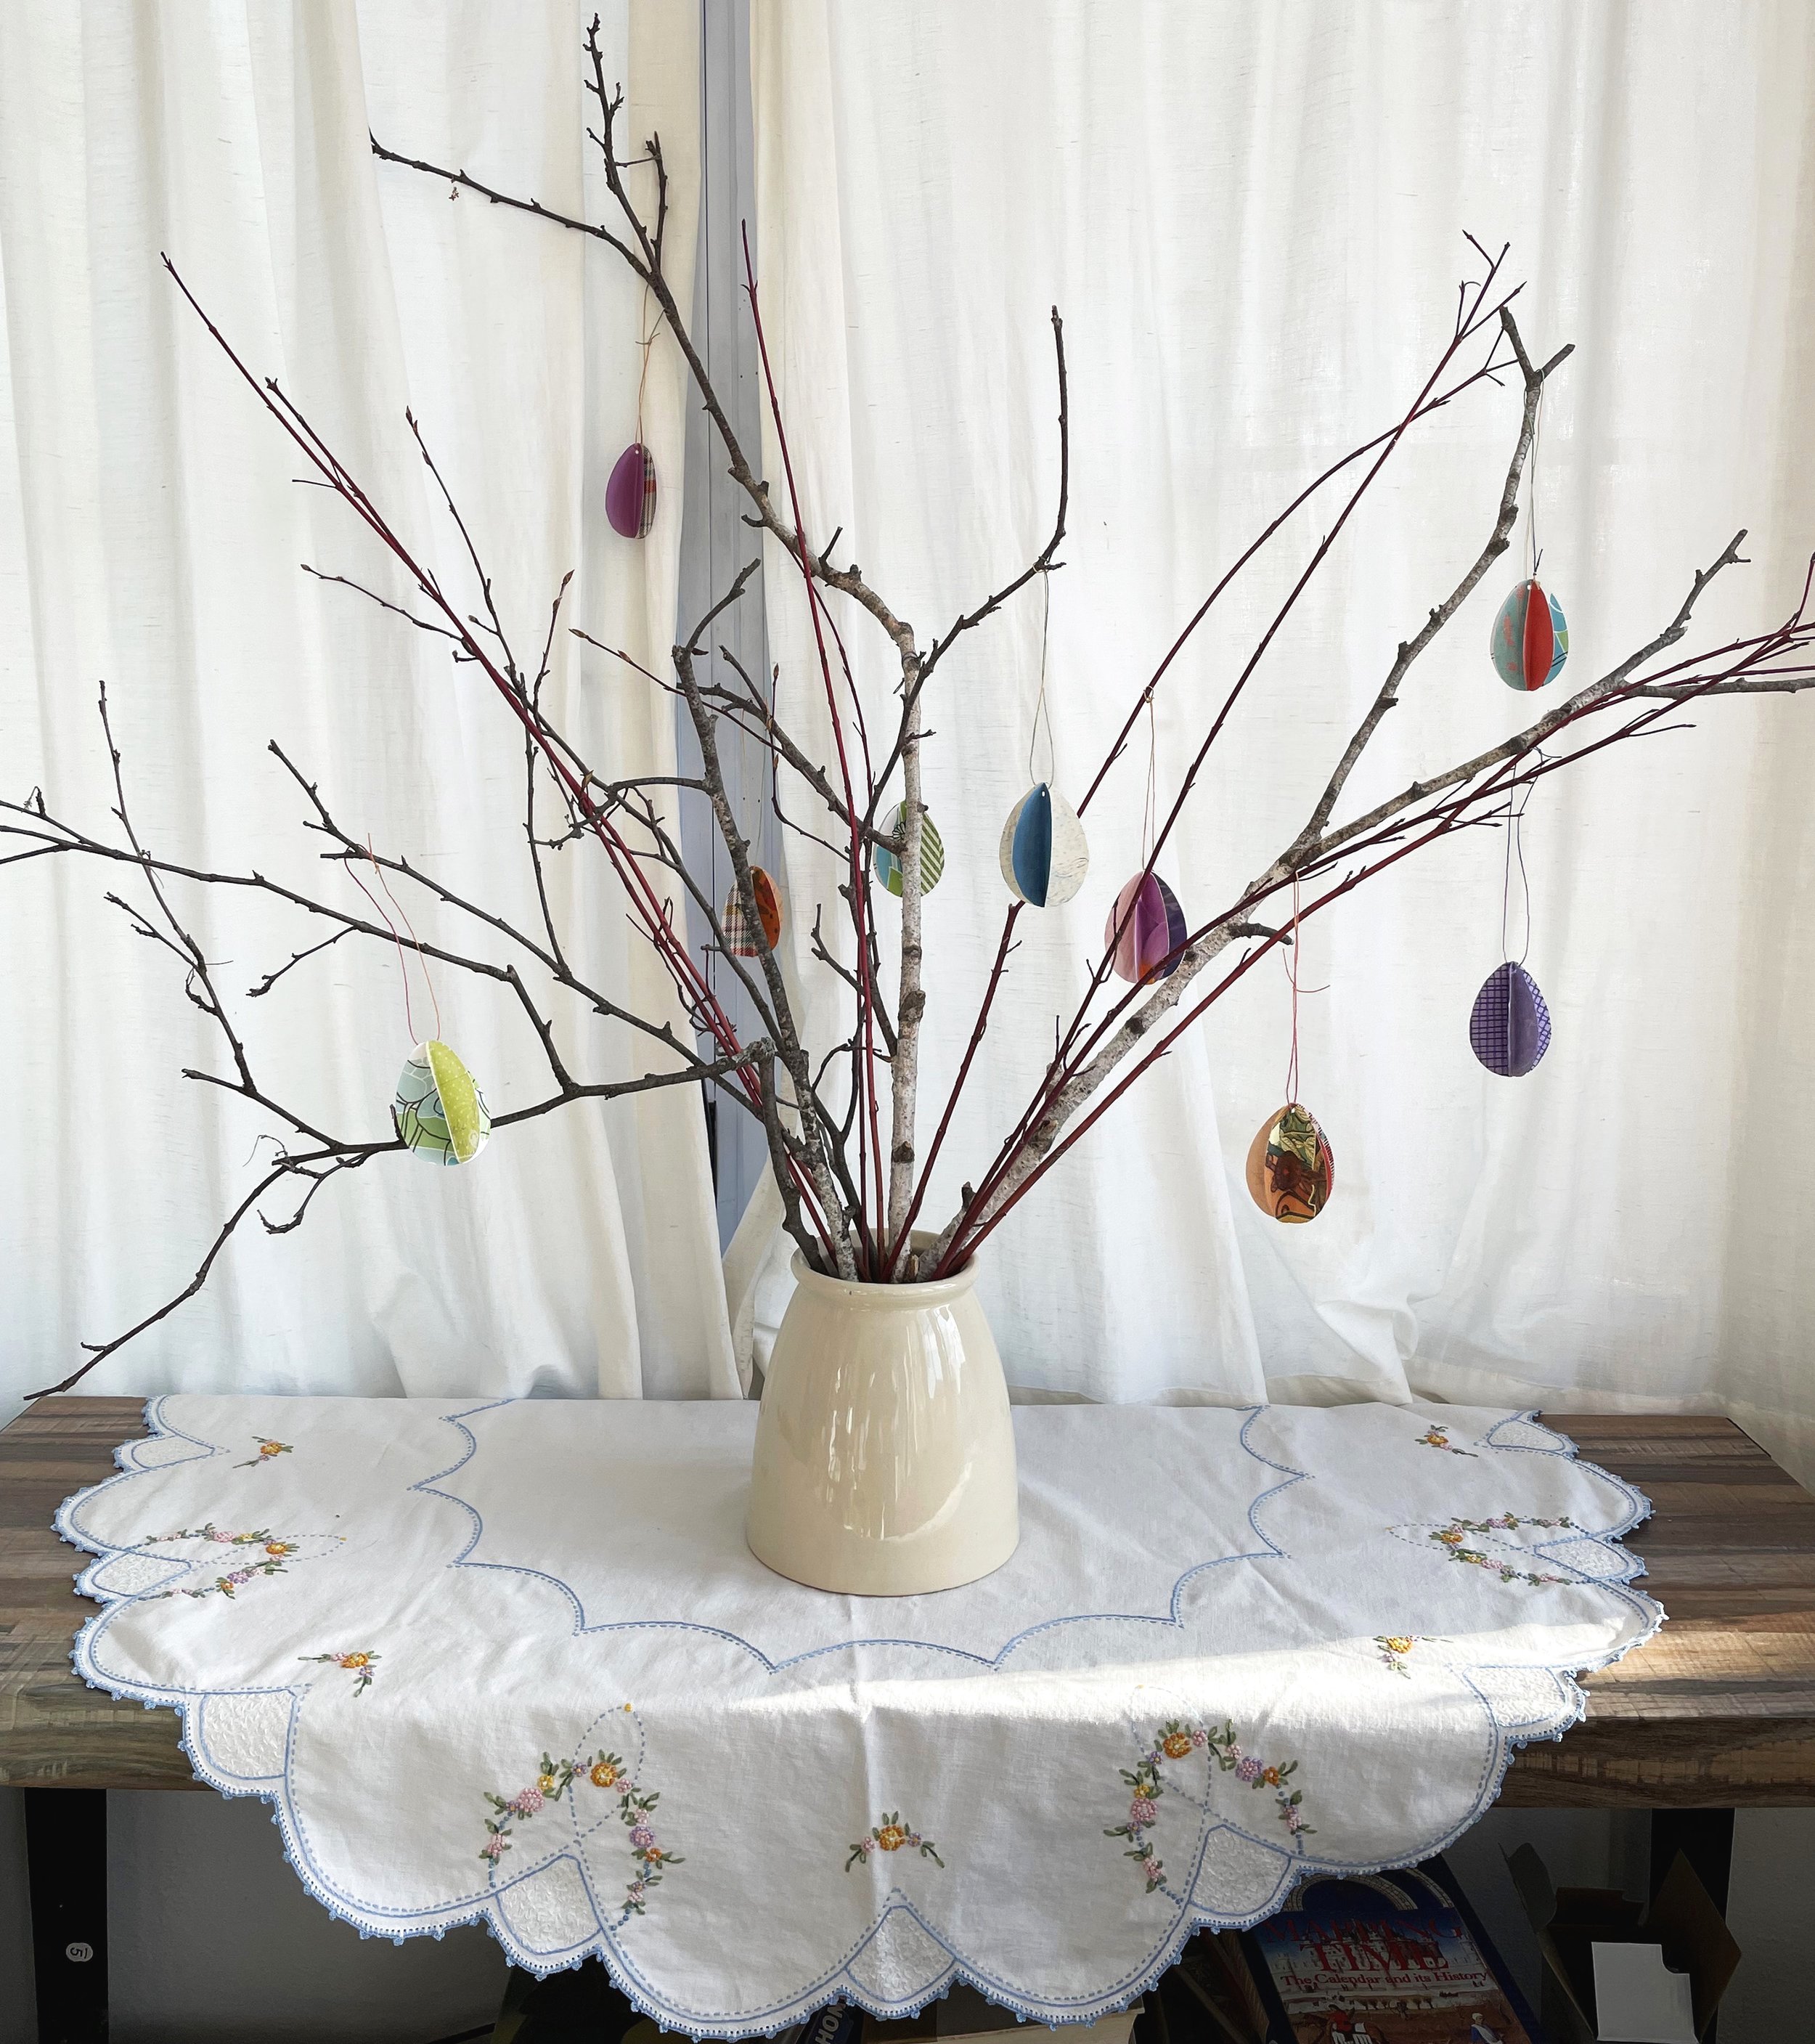
Recently I got to thinking that it would be fun to decorate an “Easter tree.” I already had a kind of stick tree in a clay vase on my porch that I had rigged last December in lieu of a regular Christmas tree, an idea I stole from Ann Wood Handmade. When it was time to put away the Christmas decorations, I kept the bundle of sticks with some eucalyptus and evergreen boughs just because I thought it looked nice out in the porch, which we can see through the living room windows when it’s too cold to sit out there.
By March, the eucalyptus and evergreens looked rather out of season, so I tossed them outside behind a shrub to add to one of the mini brush piles I have around my city yard, in discreet places, to provide habitat for bugs and other small critters.
I considered getting some plastic Easter eggs and was pondering how I would attach string or hooks to hang them, when I got to thinking that I ought to be able to make something with the many colorful paper scraps that I already have left over from collage-making or other crafts, rather than buy cheap plastic things.
A search on Pinterest led me to a site called Fireflies and Mudpies, one of those sites full of crafts and recipes, but interspersed with pop-ups and so many ads that I just looked long enough to get the idea, and then exited rather than search for the instructions or tutorial. I noticed, when I went back in order to grab the url to give them credit, that it does provide an egg shape template, which probably would have resulted in a more uniform shape, but I’m generally comfortable just winging it when it comes to paper crafts. I even like a bit of wabi-sabi.
Steps for making paper egg ornaments

Egg shapes cut from assorted leftover deco papers, with my card stock template in the upper left
1. Make or obtain an egg template. You can make your own by folding a piece of paper and cutting half an egg shape, like how you used to make a paper heart as a kid. Trace around this onto a piece of cardboard to make a sturdier template, cutting a small notch at the top and bottom to mark the center fold line.

2. Trace the egg shape onto whatever paper scraps you like, making a little mark at the notches. Score the fold line before cutting by placing a ruler next to the marks and firmly stroking with a bone folder or blunt knife or craft stick. If you enjoy doing paper crafts, it’s worth buying a bone folder from an art supply store or a book arts supplier for $5–$10.

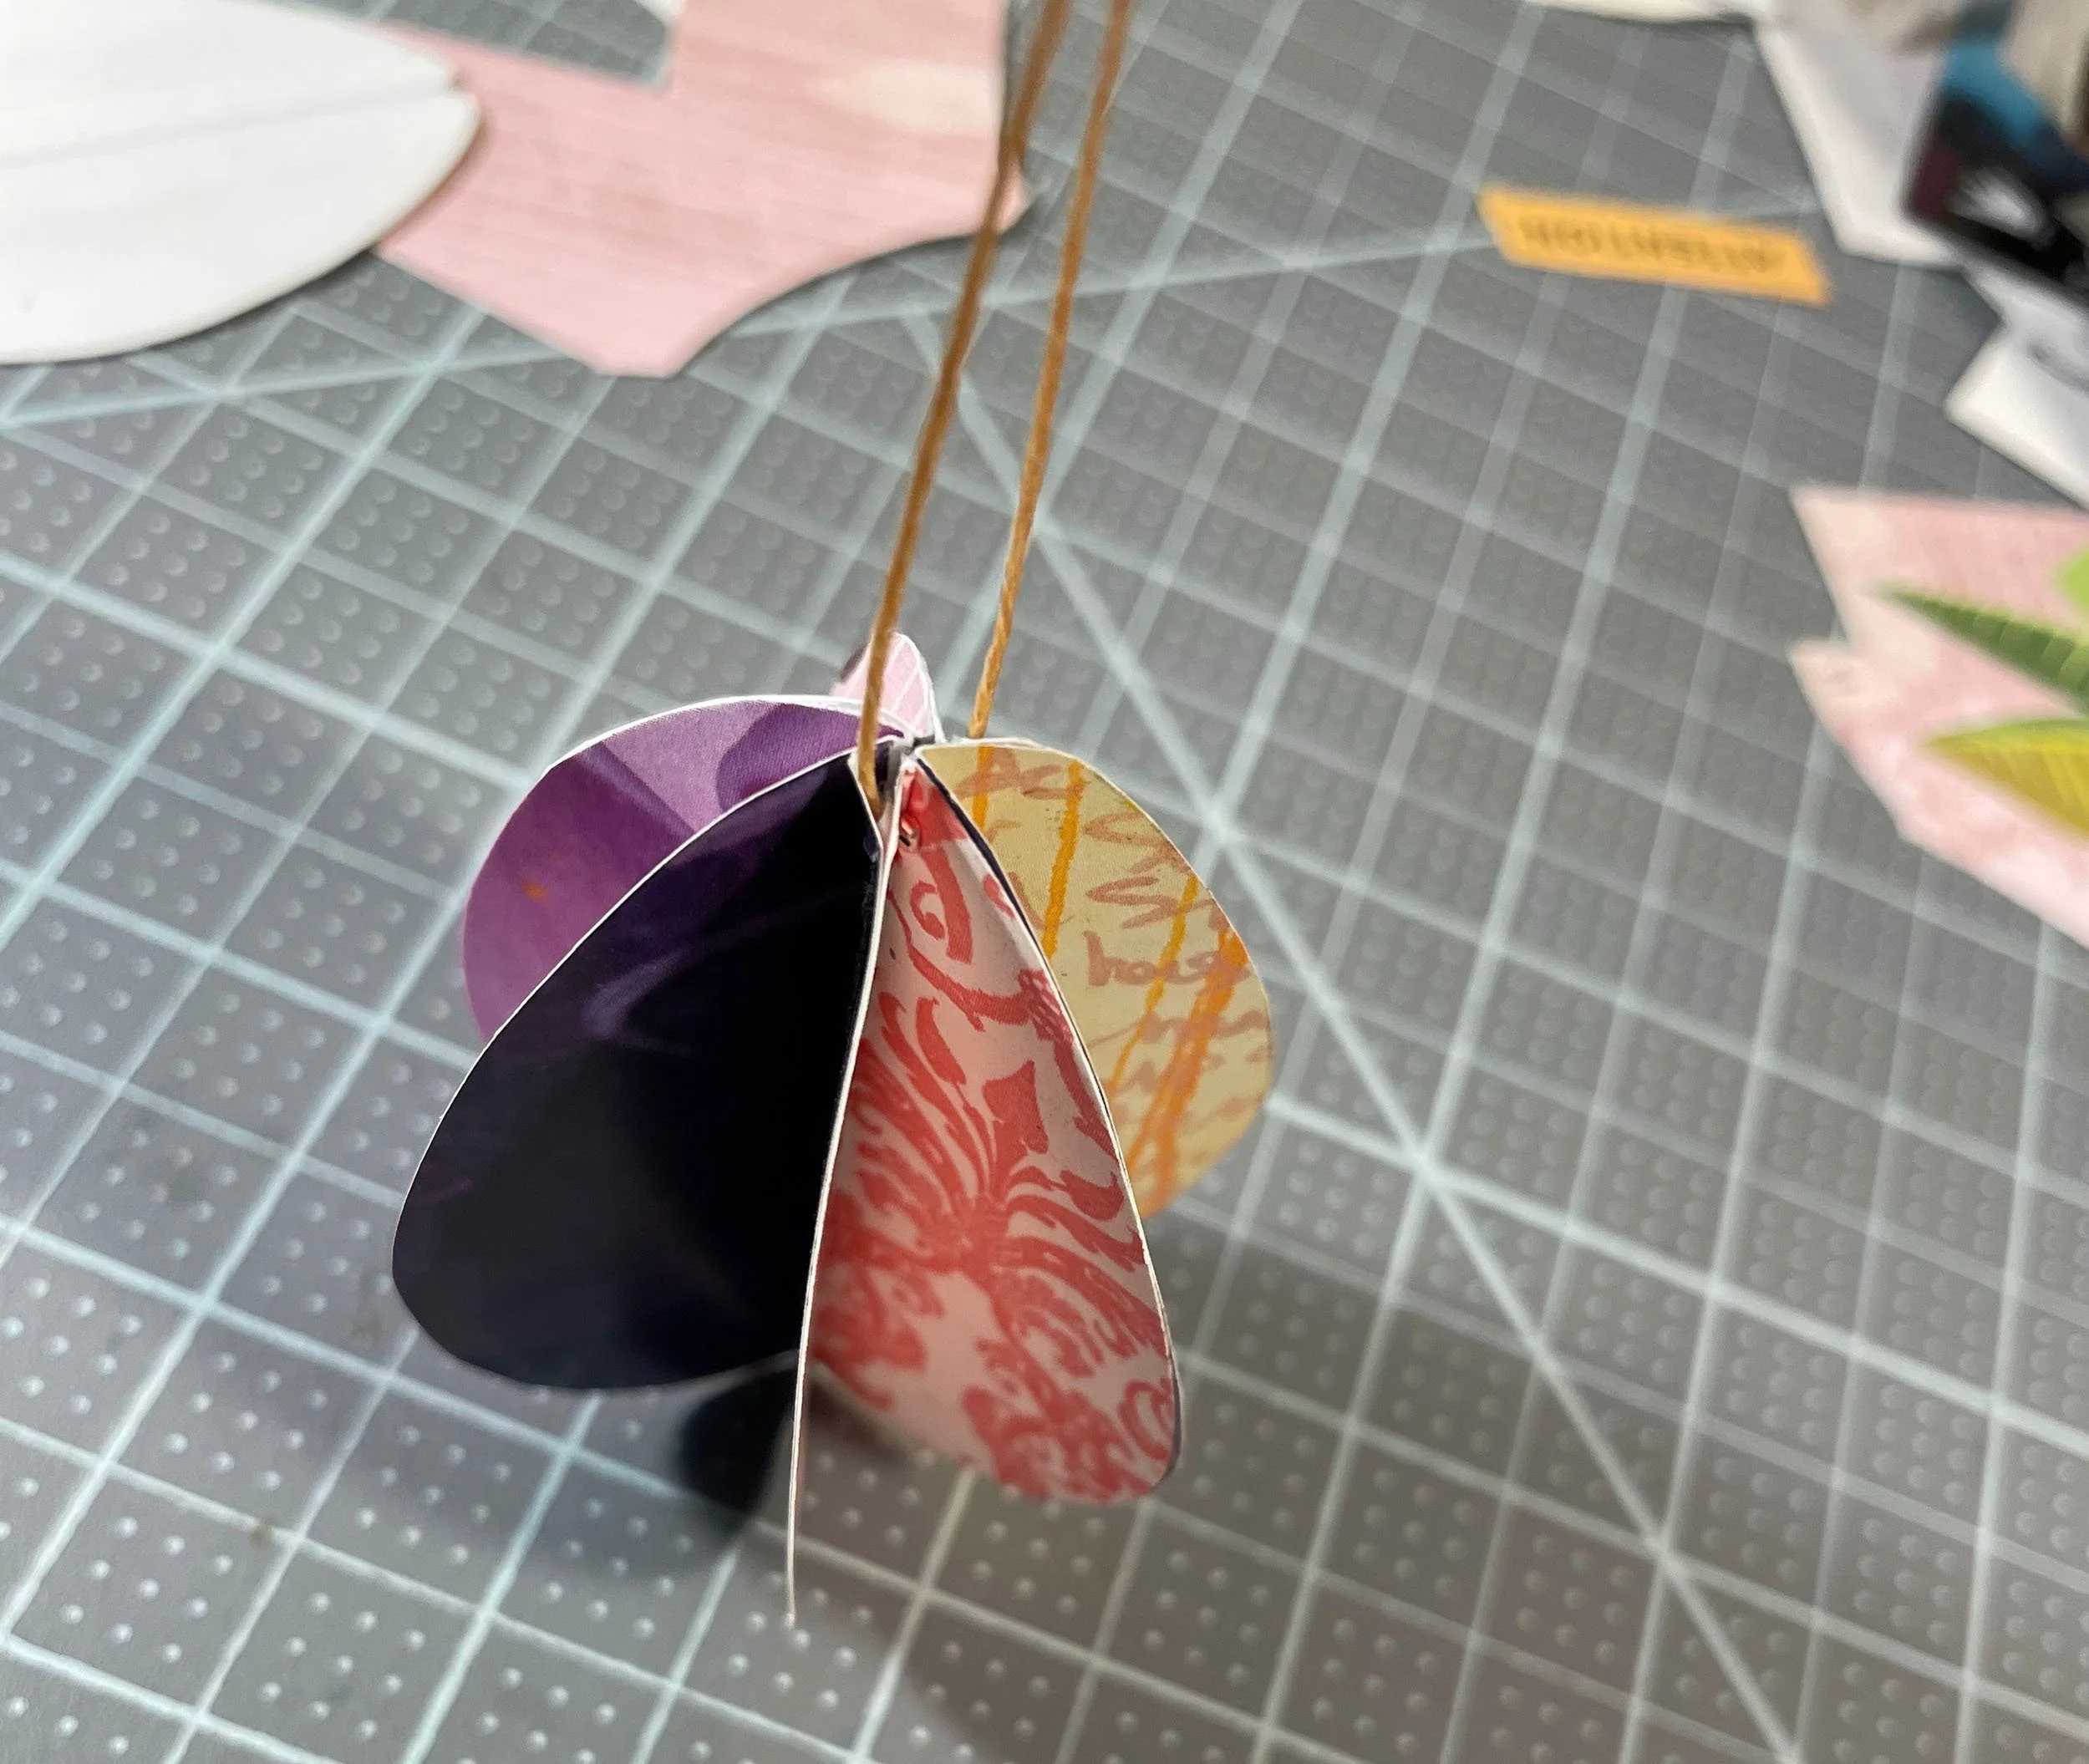
It's easiest to fold the egg shapes before cutting them out, and once they’re cut and folded you can move on to assembling them. I used 6 egg shapes to make each egg.

3. Select six of them that look good together. Take one, folded with right sides together, and apply glue with a glue stick to one half, then stick that to one half of the next egg, lining up the folded edges. I like to use glue because it allows for some maneuvering if you don’t get it positioned right at first. Don’t worry about the outer edges, you can trim those later. Rub the glued halves between your thumb and forefinger to smooth them and make sure the folded edges are lined up nicely.

Keep going until you have one left, put the glue on the whole back of that one and stick it to the wrong sides of the first and last pieces. You can lay it flat to smooth them and also rub each flange as you did the others, then arrange them evenly around the egg. Trim outer edges as needed.

Lay it flat again and punch or poke a small hole near the top. Cut a 12” piece of string and thread it through, tieing the two ends together. Arrange the flanges evenly again and admire your handiwork.

Happy Easter or Ostara or just spring! Whatever you celebrate.